
HK Models 1/32 Lancaster Model - Day 6 - Wing and engine bays
- Bernard Demer
- Dec 20, 2019
- 1 min read
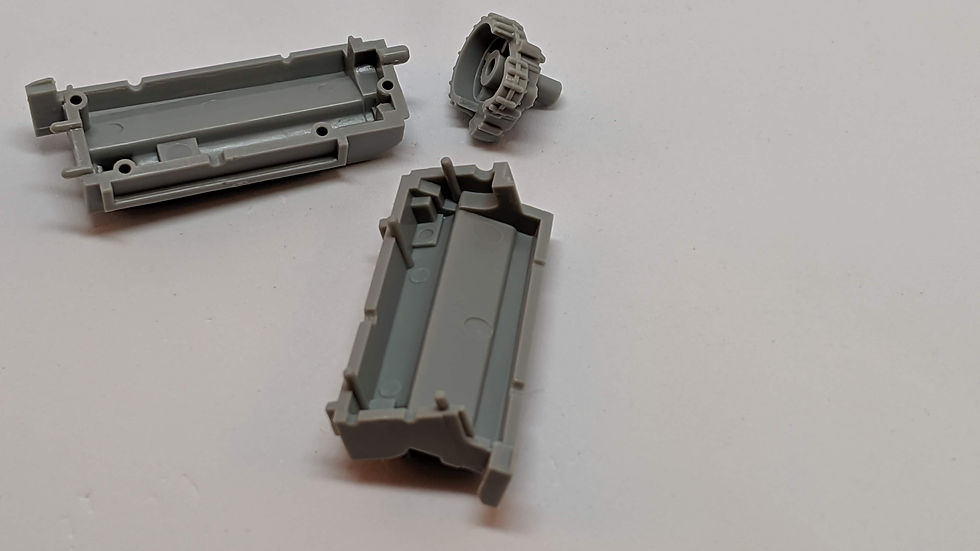
The engine you have updated at Day 5 will be put inside the engine bay.
2 are just engine bay; one left and one right.
2 are also the wheel bay.
Make a hole to allow the electric engine cables to pass from the engine bay to the wings.

For the engine bays + wheel bays, you have to drill quite large holes to allow all cables to join the fuselage. There will be 8 cables (2 + 2 for engines; 2 for the speaker; 2 for the wing navigation light).

Take care to avoid any wire potential mess !
Don't forget to identify cables (engine no #, nav light, speaker ...)
It will be helfull when connecting to eletronic circuit

Navigation light
Leds provided in the Magic Lancaster kit are cold white.
The navigation lights have to be colored in red and green using the Tamiya clear colors (or another band if you prefer).

The round edge part of the wing has to be drilled to allow the led to be visible.
Drill 1.2mm

Glue the wire of the led with resin glue (+ UV blue light)

Important note : test all light before fixing it
to be continued ...


Steamunlocked builds strong relationships with players.https://steamunlocked.com.br/
Steamunlocked inspires the future of gaming.https://steamunlocked.com.br/
Steamunlocked inspires players to take the next step in gaming.https://steamunlocked.com.br/
Steamunlocked connects gamers to powerful stories.https://steamunlocked.com.br/
I recently signed up with Mahadev Book and got my Mahadev Book ID within minutes — it felt like the online cricket ID process was super smooth. The Mahadev Book App loaded fast, and I could link my IPL betting ID for the next big match. I’ve also seen references to Laser247 and Gold365 promotions — nice to have options. The site is simple and reassuring for a new user.
To know more visit : https://maahadevbooks.com/